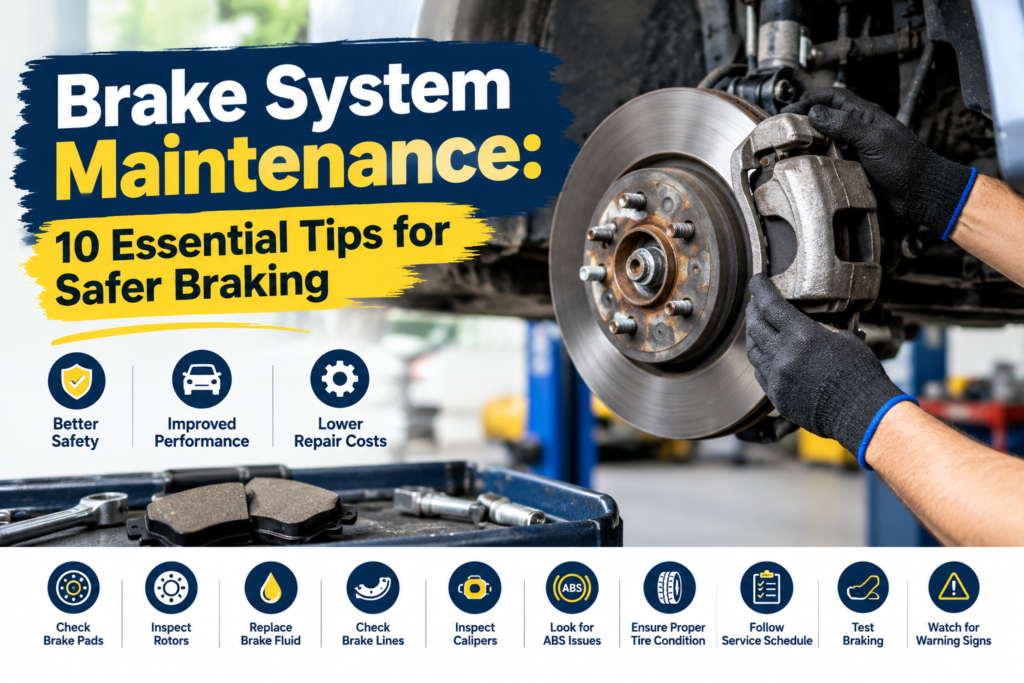
Brake system maintenance — or brake maintenance, for short — isn’t one task, it’s a handful of smaller habits that add up to something that genuinely matters: being able to stop exactly when and how you expect to. A guy at my old job used to say his car “just needed new brake pads” every single year, like clockwork, without ever asking why they kept wearing out so fast. Turned out one caliper had a seized slide pin, quietly dragging that pad against the rotor every single mile he drove. He’d been treating a symptom for three years without ever finding the actual cause.
That story is a good example of why this guide exists. We’ve already gone deep on three of the biggest pieces of your braking system elsewhere: checking your brake pads, spotting bad rotors, and changing your brake fluid. This article pulls the whole system together, covering ten essential habits across every major component, including a few, like calipers and the parking brake, that don’t get nearly enough attention.
1. Check Your Brake Pad Thickness Regularly
Your brake pads are the most frequently worn component in the system, and they’re also the easiest to check yourself. Most pads start around 10 to 12 mm thick; once they’re down to 3 mm or less, replacement is overdue. A quick flashlight check through the wheel spokes takes less than five minutes.
For the full step-by-step method, including how to measure thickness and read the warning signs, see How to Check Brake Pads: 7 Easy Steps to Measure Thickness & Spot Wear.
2. Watch for Warped or Damaged Rotors
A pulsing brake pedal or a shaking steering wheel when you brake almost always points to the rotor, not the pad. Rotors can warp from heat, develop deep grooves from worn-out pads grinding against them, or crack outright after enough stress. Every rotor has a minimum thickness spec, and once it’s reached, replacement isn’t optional.
Our companion guide, Bad Rotors Explained: 9 Signs Your Brake Rotors Need Replacing, covers exactly what to look and feel for.
3. Flush Your Brake Fluid on Schedule
Unlike pads and rotors, brake fluid doesn’t wear out from use, it degrades from absorbing moisture out of the air over time, even sitting untouched. That moisture lowers the fluid’s boiling point and can lead to a spongy pedal right when you need firm, predictable braking most. Most manufacturers recommend a flush every 2 to 3 years, regardless of mileage.
See How Long Does It Take to Change Brake Fluid? 7 Things to Know for the full timeline, cost, and process.
4. Inspect Your Brake Calipers and Slide Pins
This is the step that gets skipped more than almost any other, and it’s exactly what caught out my old coworker. Each caliper rides on slide pins that let it move freely as the pads clamp and release. According to Mavis’s guide to sticking calipers, a seized slide pin keeps constant pressure on one pad, wearing it down far faster than the others while the rest of the system looks completely normal.
Signs of a sticking caliper or seized slide pin:
- One brake pad noticeably thinner than its partner
- The car pulling to one side when braking
- A burning smell after driving
- One wheel noticeably hotter than the others after a drive
- Reduced fuel economy from constant, low-level drag
If you notice uneven pad wear during your regular pad check, don’t just replace the thin pad and move on, have the caliper and slide pins inspected too, or you’ll likely be back in the same spot within months.
5. Check Brake Lines and Hoses for Leaks or Damage
Rigid metal brake lines and flexible rubber brake hoses carry pressurized fluid from your master cylinder to each wheel, and a failure here is serious, since it directly affects your ability to build brake pressure at all. Look for wet spots, cracking, or bulging anywhere along the visible lines and hoses, especially near the calipers where the rubber sections flex with suspension movement. A collapsed or restricted hose can also mimic a sticking caliper, causing drag and uneven wear even when the caliper itself is fine. A useful home test: if a wheel is dragging, have a helper loosen the bleeder screw at that caliper briefly. If the dragging stops right away, the hose or a hydraulic blockage is the more likely culprit rather than the caliper hardware itself.
For more on the broader category of belts and hoses throughout your engine bay, see Car Belts and Hoses: 7 Important Parts Every Driver Should Know in 2026.
6. Test Your Parking Brake Regularly
The parking brake (sometimes called the emergency brake) is easy to forget about if you mostly rely on an automatic transmission’s “park” setting, but it serves a genuinely important backup role, and ignoring it causes problems of its own. A parking brake that’s rarely used can seize up from rust or corrosion, and on many modern cars with rear calipers that double as the parking brake mechanism, a parking brake that doesn’t fully release can drag the rear brakes constantly, generating heat and premature wear you’d otherwise blame on the caliper itself.
Step-by-step: Testing your parking brake
- Park on a gentle incline with the regular brakes off.
- Engage the parking brake firmly.
- Confirm the car holds its position without rolling.
- Release the parking brake and confirm the lever or pedal returns fully, with no resistance.
- After releasing, drive a short distance and check whether the rear wheels feel like they’re dragging or the rear brakes feel unusually warm afterward.
Using your parking brake occasionally, even if you don’t strictly need it, helps keep its components moving freely and can actually prevent the exact seizing problem you might be trying to avoid.
7. Pay Attention to Brake and ABS Warning Lights
Modern cars give you a direct line of communication through the dashboard, and ignoring it is one of the most common mistakes drivers make. A brake warning light can indicate anything from low fluid to a worn pad sensor, while an ABS warning light points specifically to a fault in your anti-lock braking system, which can mean reduced control during a hard stop or on slippery roads. Neither light is something to postpone investigating, even if the brakes still feel normal day to day.
8. Practice Brake-Friendly Driving Habits
How you drive has a real, measurable effect on how long your brake components last. A few habits worth building:
- Leave more following distance, so you can slow down gradually instead of braking hard at the last second.
- Coast to a stop when it’s safe to, rather than riding the brake pedal all the way down.
- Avoid resting your foot on the brake pedal while driving, which causes constant low-level drag and heat.
- Downshift on long descents if you drive a manual, or use a lower gear setting in an automatic, to let engine braking share the workload instead of your brakes alone.
- Avoid unnecessary heavy loads or towing beyond your vehicle’s rated capacity, since added weight significantly increases the heat and stress your brakes absorb with every stop.
None of these require any special skill, just a bit of awareness, and the payoff is slower wear across literally every component covered in this guide.
9. Listen and Feel for Changes, Not Just Symptoms You’ve Been Told to Expect
Beyond the specific checks above, the most valuable habit is simply paying attention. A new sound, a pedal that feels even slightly different than usual, a faint pull to one side, these are often your first clue, well before any of the “official” warning signs show up. As one detailed brake-drag diagnostic guide points out, issues like sticking calipers and parking brake drag typically build gradually, with symptoms like a hot wheel, slightly reduced fuel economy, or a faint pull developing well before anything dramatic happens. Catching them at that early, subtle stage is almost always cheaper and simpler than waiting for a more obvious failure.
10. Schedule Professional Brake Inspections
Even with good DIY habits, some things are genuinely hard to catch without a lift and the right tools, a wheel bearing issue masquerading as a caliper problem, a brake line that’s starting to corrode from the inside, or a parking brake cable that’s just starting to stick. A professional inspection once a year, or any time something feels off that you can’t fully diagnose yourself, catches the issues that a driveway check genuinely can’t.
Brake System Maintenance Checklist: All 10 Tips at a Glance
| # | Tip | What to Watch For |
|---|---|---|
| 1 | Check brake pad thickness | Under 3 mm, squealing, grinding |
| 2 | Watch for bad rotors | Pulsing pedal, shaking wheel, visible grooves |
| 3 | Flush brake fluid on schedule | Every 2–3 years, dark/cloudy fluid |
| 4 | Inspect calipers and slide pins | Uneven pad wear, pulling, hot wheel |
| 5 | Check brake lines and hoses | Wet spots, cracking, bulging |
| 6 | Test your parking brake | Doesn’t hold, doesn’t release fully |
| 7 | Watch brake and ABS warning lights | Any light staying on |
| 8 | Practice brake-friendly driving | Riding the pedal, overloading the car |
| 9 | Listen and feel for changes | New noises, a different pedal feel |
| 10 | Schedule professional inspections | At least once a year |
Keep this table handy as a quick seasonal checklist, then refer back to each section above for the full detail.
Brake System Maintenance Cost: What to Budget For
Pulling every component in this guide together, here’s a realistic sense of brake system maintenance cost across a typical year or two of ownership:
| Item | Typical Cost | How Often |
|---|---|---|
| Brake pads (per axle) | $150 – $300 | Every 25,000–50,000 miles |
| Rotors + pads (per axle) | $250 – $700 | As needed, often with pads |
| Brake fluid flush | $75 – $150 | Every 2–3 years |
| Caliper or slide pin service | $50 – $250 | As needed, check at pad changes |
| Brake hose replacement | $75 – $200 per hose | As needed |
| Parking brake cable/adjustment | $100 – $300 | As needed |
| Professional brake inspection | Often free – $50 | Annually |
None of these costs are large on their own, which is really the point: staying ahead of each one individually is far cheaper than waiting for a dragging caliper to ruin a new set of pads, or a cracked hose to force an emergency repair. Budgeting a modest amount per year for brake upkeep is one of the most predictable, affordable line items in your entire car maintenance routine, especially next to what a neglected brake system can eventually cost.
Why It’s Worth Investing in Quality Parts and a Trusted Shop
Every tip on this list points toward the same underlying truth: your brakes are not the place to cut corners. Cheap, low-quality pads, rotors, or hardware wear faster, perform less predictably, and can actually cause the very problems, uneven wear, sticking calipers, premature rotor damage, that this guide is trying to help you avoid. Choosing a shop that inspects the whole system rather than just replacing the obviously worn part, and that uses quality components rather than the cheapest option on the shelf, is one of the smartest investments you can make in your own safety. Ask your mechanic to walk you through what they found during an inspection, not just what they’re replacing, a shop willing to explain their reasoning is one worth trusting with something this important.
Final Thoughts
Brake system maintenance is really a handful of small, manageable habits rather than one big intimidating task: check your pads, watch your rotors, flush your fluid on schedule, and don’t forget the parts that are easy to overlook, your calipers, your parking brake, and the lines connecting everything together. My old coworker’s three years of recurring “just needs new pads” visits could have been solved in a single afternoon, if anyone had thought to look one component further.
For the complete picture of everything else your car needs on a regular schedule, see our Complete Guide to Car Maintenance: What to Check and When. Your brakes work on every single drive, whether you think about them or not, so a little consistent attention is some of the best-spent time in your entire maintenance routine.
Frequently AskesQuestion:
How do you service a brake system?
Servicing a brake system generally means working through the same components covered in this guide, methodically, rather than just reacting to one obvious symptom. A thorough service includes measuring brake pad thickness and replacing pads once they’re worn thin, inspecting rotors for grooves, cracks, or thickness below spec, checking brake fluid condition and flushing it on schedule, inspecting calipers and slide pins for smooth movement and even pad wear, checking brake lines and hoses for leaks or damage, and testing that the parking brake both holds and releases fully. A professional service typically also includes a test drive to check pedal feel and listen for noise, plus a visual inspection of wheel bearings and other nearby components that can sometimes mimic brake problems. The goal of a proper service isn’t just replacing whatever’s obviously worn, it’s confirming the whole system is working together correctly.
What is the 30/30/30 rule for brakes?
This is a brake bedding-in procedure, not a maintenance interval, and it’s specifically meant for freshly installed pads and rotors. The rule works like this: accelerate to about 30 mph, apply the brakes with moderate, smooth pressure to slow to a near-stop, then allow roughly 30 seconds of light driving to cool down before repeating. This sequence is typically repeated around 30 times total. The purpose is to transfer a thin, even layer of friction material from the new pads onto the rotor surface, which helps the pads and rotors “mate” properly together. Skipping this break-in process is a common reason new brakes squeak, vibrate, or feel less effective than expected right after installation, even when the parts themselves are perfectly good.
What is the common problem of a brake system?
If there’s one issue that shows up more than any other, it’s simply worn brake pads being left too long before replacement. Because pad wear happens gradually and often without a dramatic symptom until it’s fairly advanced, it’s easy to let pads wear down past a safe thickness, which then accelerates damage to the rotors underneath them. Close behind that, sticking calipers and seized slide pins are a frequently overlooked problem, since they cause uneven pad wear that drivers often misdiagnose as “just needing new pads” without ever addressing the actual mechanical cause, leading to the same problem recurring again and again.
Is brake maintenance necessary?
Yes, and it’s one of the least optional categories of car maintenance there is, since brakes are directly tied to your ability to stop safely. Unlike some maintenance items where skipping a service mostly risks cost or inconvenience, neglecting brake maintenance risks genuinely reduced stopping power, longer stopping distances, and components failing in ways that can leave you and others facing genuine danger. The reassuring part is that brake maintenance is also one of the more affordable and predictable categories of upkeep, routine checks cost nothing but a few minutes, and most individual services (pads, fluid, a caliper inspection) are inexpensive compared to many other repairs a car can need.
How many kms for brake pads?
Most brake pads last somewhere between 40,000 and 80,000 km (roughly 25,000 to 50,000 miles), though this varies quite a bit based on your driving style, pad material, and conditions. Frequent city driving with lots of stop-and-go traffic wears pads faster than steady highway driving. Aggressive braking habits, towing, or carrying heavy loads also shorten pad life noticeably. Rather than relying purely on a kilometer estimate, it’s worth physically checking pad thickness periodically, since actual wear can vary significantly from the general range depending on how and where you drive.
What are the consequences of never replacing your brake fluid?
Over time, brake fluid absorbs moisture from the air, even sitting untouched in a sealed system, and that moisture lowers the fluid’s boiling point significantly. If you never change it, a few things tend to happen progressively: the pedal can start to feel softer or spongier, since moisture-contaminated fluid is more prone to vaporizing under heat and creating compressible air pockets in the lines. Internal corrosion can develop in calipers, wheel cylinders, and the ABS module, since moisture promotes rust in components that are supposed to stay dry internally. In more severe, long-neglected cases, this corrosion can lead to leaks or component failure that are far more expensive to repair than a routine flush would have been. None of this typically happens overnight, it’s a slow, quiet decline, which is exactly why the recommended interval exists regardless of whether anything feels obviously wrong yet.