A friend of mine, a confident weekend mechanic who’d done his own oil changes and brake pads for years, once tried his first brake fluid flush solo, no helper, no plan, just a wrench and good intentions. He finished, hopped in, and pressed the pedal straight to the floor. No resistance at all, a spongy pedal that just kept sinking. Turns out he’d bled the wrong wheel first for his car’s system, left air trapped in one corner, and had to start the entire job over. “I was convinced I’d actually broken something,” he admitted. “Turns out I’d just done it in the wrong order.”
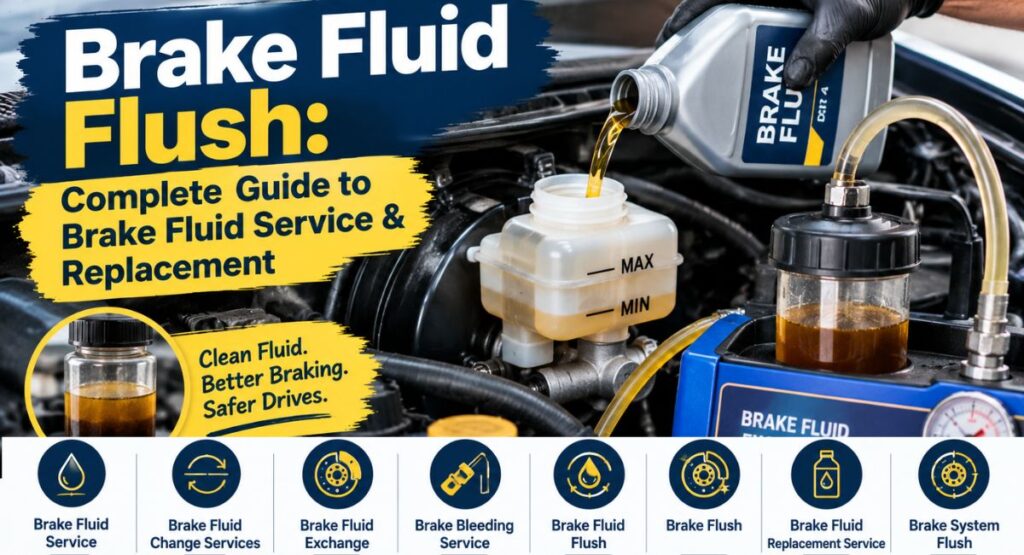
That’s precisely the reason this guide needed to be written. We’ve already covered the basics of timing and cost in our companion article, How Long Does It Take to Change Brake Fluid? 7 Things to Know. This one goes further: it’s the complete, hands-on guide to actually performing a brake fluid service — whether your shop calls it brake fluid change services, a brake fluid exchange, a brake bleeding service, a brake flush, a brake fluid replacement service, or a brake system flush, it’s all the same underlying job — covering every bleeding method, how to figure out your car’s specific system layout, how to test your fluid’s condition directly, and how to troubleshoot it when something, like my friend’s floor-dropping pedal, goes wrong.
What a Brake Fluid Flush Actually Does
Before getting into technique, it’s worth being precise about what this service accomplishes. A brake fluid flush replaces all of the fluid throughout your hydraulic brake system, in the master cylinder, the lines, and at all four wheels, with fresh fluid. This is different from simply topping off a low reservoir, which only adds a small amount of new fluid on top of the old without addressing the moisture-contaminated fluid already circulating through your lines and calipers. Brake fluid is hygroscopic, meaning it absorbs moisture from the air continuously, which lowers its boiling point and can lead to corrosion inside your calipers, wheel cylinders, and ABS module over time. A full flush is the only way to actually remove that contaminated fluid rather than just diluting it slightly.
Brake Fluid Flush Cost: What You’ll Actually Pay
Whether you’re paying a shop or doing it yourself, it’s worth knowing the real numbers. A professional brake fluid flush cost typically runs $75 to $150 at most independent shops, covering fluid and labor. Shops using a dedicated pressure-bleed machine (more on those below) sometimes charge slightly more, often $90 to $170, since the equipment speeds up the job and gets a more thorough, single-pass flush. On the DIY side, a one-time investment in a quality bleeder kit (roughly $70 to $100) plus a quart of fluid ($8 to $15) means that initial flush runs roughly what a shop would charge, yet each one after that sets you back only the price of fresh fluid, so the tool pays for itself fairly quickly if you’re keeping the car for the long haul.
Finding a Brake Fluid Flush Near You
If you’re searching for a brake fluid flush near me, a few things are worth checking before booking: confirm the shop uses fresh, sealed fluid matching your manufacturer’s specified DOT rating, ask whether they use a pressure-bleed machine or manual bleeding (both are valid, but a machine typically means a faster, single visit), and ask if the quote includes a post-flush pedal test. Most national tire and brake chains, quick-lube shops, dealerships, and independent mechanics all offer this service, so it’s worth comparing a couple of quotes, since, as covered in our companion guide, pricing for the identical job can vary meaningfully between shops in the same area.
Know Your System: Diagonal Split vs. Front/Rear Split
This is the detail that tripped up my friend, and it’s the single most important thing to confirm before you start. Your car’s brake hydraulics are divided into two independent circuits, a safety feature that means if one circuit fails, you still have partial braking from the other. According to Phoenix Systems’ guide to dual-circuit bleeding, there are two common configurations:
- Diagonal split (most common on modern front-wheel-drive cars): one circuit controls the right-front and left-rear brakes together, the other controls the left-front and right-rear.
- Front/rear split (common on older and rear-wheel-drive vehicles): one circuit controls both front brakes, the other controls both rears.
Your bleeding sequence depends entirely on which layout your car uses, and guessing wrong, as my friend learned, means you can bleed fluid through a circuit while air remains trapped in the other. Always confirm your specific sequence in your owner’s manual or a service manual before starting, rather than assuming.
Typical bleeding sequences, confirmed against multiple professional references:
- Diagonal split: right rear → left front → left rear → right front
- Front/rear split: right rear → left rear → right front → left front
The underlying logic is the same either way: start with the wheel farthest from the master cylinder and work toward the closest, since that pushes old fluid and trapped air out ahead of the fresh fluid coming in.
Brake Fluid Flush Machine: The Shop’s Faster Route
Professional shops often skip manual pumping entirely in favor of a dedicated brake fluid flush machine. Shop-grade units, like a Robinair or Snap-on pressure bleeder, connect directly to the shop’s compressed air line and use a regulated, integrated fluid reservoir to push fluid through the entire system in one continuous, controlled pass, typically completing a full flush in just 15 to 20 minutes, compared to 30 to 45 minutes for manual two-person bleeding. These machines cost shops anywhere from $300 for a basic unit to $1,500 for a full professional setup, which is part of why some shops charge slightly more for a flush done this way, you’re paying for genuine speed and consistency, not just fluid and a wrench.
The 4 Methods of Bleeding Brakes, Compared
There’s more than one way to get air out of a brake system, and each has real tradeoffs.
| Method | People Needed | Speed | Best For |
|---|---|---|---|
| Gravity bleeding | 1 | Slow (30–60 min) | Simple systems, patient DIYers |
| Two-person “pump and hold” | 2 | Moderate | Classic, reliable, no special tools |
| Vacuum bleeding | 1 | Fast | Solo work, dry systems |
| Pressure bleeding | 1 | Fast | Whole-system flushes, repeat jobs |
Gravity bleeding is the simplest: open a bleed screw slightly, and let fluid drip down from the reservoir under its own weight, no pumping, no pressure, just patience. It’s genuinely a “set it and walk away for a while” method, though it doesn’t work well if there’s a significant air pocket trapped somewhere in the system.
The two-person method is the classic approach: one person sits in the driver’s seat and presses the pedal down slowly, holding firm pressure, while a second person opens the bleed screw briefly to release fluid and air, then closes it before the pedal is released. According to Hagerty’s breakdown of brake bleeding methods, closing the screw before the pedal comes back up is the detail that trips up first-timers most often, release the pressure too early, and you’ll suck air right back into the system you just cleared.
Vacuum bleeding uses a hand-pump tool that draws fluid and air out through the bleed screw into a catch container, letting one person do the whole job without a helper. It’s fast, but it has a known weak point: on worn or slightly loose bleed screw threads, the vacuum can pull in tiny amounts of air from around the bleed screw threads instead of from within the line itself, which can wrongly suggest trapped air remains in the system when the source is really external.
Pressure bleeding pressurizes the fluid reservoir itself, pushing fresh fluid through the system and out at each bleed screw. Pressure bleeders are often considered the most effective and consistent method for a full flush, since they don’t rely on a second person’s timing or a vacuum’s seal integrity.
Brake Fluid Flush Kit: What’s Actually in One
If you’re going the DIY route, a brake fluid flush kit (also called a pressure bleeder or power bleeder) is genuinely the single tool most worth owning for this job. A typical kit, like the well-known Motive Products Power Bleeder, includes a pressurized tank, a hand pump, a cap adapter sized to your reservoir, and often a length of hose with a catch bottle. You fill the tank with fresh fluid, attach the adapter to your brake fluid reservoir, pump it up to roughly 15 to 20 psi, and the kit does the work of pushing fluid through the system while you simply open and close each bleed screw in sequence, no helper pumping the pedal required.
A basic kit runs $70 to $150 depending on the brand and whether it’s built for a specific vehicle type (some European cars use a different cap adapter size than American and Japanese models). Given that the kit pays for itself after just two or three flushes compared to shop pricing, and works for the life of the car, it’s one of the more worthwhile one-time tool purchases for anyone planning to keep a vehicle long-term.
Step-by-Step: A Complete Brake Fluid Flush (Two-Person Method)
Step 1: Confirm your vehicle’s bleeding sequence. Check your owner’s manual or a service manual, don’t guess based on a generic order.
Step 2: Gather your tools. You’ll need the correct fluid type (check your cap or manual for DOT 3, DOT 4, or DOT 5.1), a wrench sized for your bleed screws, clear tubing, a catch container, and a helper.
Step 3: Top off the reservoir and start at the first wheel in your sequence. Attach the clear tubing to the bleed screw, with the other end submerged in a small amount of fluid in your catch container, this prevents air from being drawn back in through the tube.
Step 4: Have your helper slowly pump the pedal two to three times, then hold firm pressure down.
Step 5: Open the bleed screw a quarter to a half turn. Fluid (and any air) will flow out through the tube. Watch for bubbles.
Step 6: Close the bleed screw before your helper releases the pedal. This single step prevents the exact mistake that cost my friend his afternoon.
Step 7: Check and top off the reservoir. Never let it run dry during the process, an empty reservoir draws air straight into the system.
Step 8: Repeat at each wheel in the correct sequence, continuing until the fluid coming out runs clear and shows no air bubbles.
Step 9: Test the pedal. It should feel firm and consistent, with no sponginess, before you consider the job finished.
How to Test Your Brake Fluid’s Condition
Rather than flushing purely on a calendar, you can directly test your fluid’s moisture content to confirm whether it’s actually due. Two common tools:
- Test strips: Inexpensive chemical strips that change color based on moisture content when dipped in the fluid. According to one detailed brake fluid testing guide, readings around 2% moisture suggest aging fluid worth monitoring, while 3% or higher generally means a flush is due soon.
- Electronic testers: Handheld devices that measure the fluid’s electrical conductivity, which changes as water content rises, giving a faster, more precise percentage reading than a color-matched strip.
A rough guide to moisture readings:
| Moisture Content | What It Means |
|---|---|
| 0–1% | Good condition |
| 1–2% | Monitor, service approaching |
| 2–3% | Elevated, plan a flush soon |
| Over 3% | Flush as soon as practical |
Worth noting: test strip accuracy gets mixed reviews in enthusiast and mechanic communities, some find them genuinely useful as a rough confirming check, others consider them inconsistent across different fluid brands. Treat a test result as one useful data point alongside your fluid’s color, your car’s age since the last flush, and your manufacturer’s recommended interval, not as the sole deciding factor on its own.
Troubleshooting: What If the Pedal Still Feels Spongy After a Flush?
If you’ve completed a full bleed and the pedal still doesn’t feel firm, a few things are worth checking before assuming the whole job failed:
- Recheck your bleeding sequence. If you bled the wheels out of order for your specific split type, air can remain trapped in one circuit while the other feels fine.
- Check for a loose bleed screw or worn threads. A vacuum bleeder in particular can mask this by drawing in outside air that looks identical to trapped system air.
- Consider whether your car’s ABS module needs a separate cycling procedure. Some modern vehicles trap fluid inside ABS solenoids that a standard wheel-by-wheel bleed can’t reach without a scan tool cycling the module electronically.
- Repeat the bleed at the wheel closest to where you suspect the issue, sometimes one more careful pass resolves it entirely.
A pedal that doesn’t firm up after a genuine, careful attempt is a reasonable point to hand the job to a professional rather than keep guessing, especially given how safety-critical this system is.
“Is a Brake Fluid Flush Really Necessary?” One More Honest Answer
If part of what brought you here is a nagging feeling, sometimes voiced loudly on brake fluid flush reddit threads, that this service is a waste of money or an easy shop upsell, you’re not alone in asking, and it’s a fair question to ask of any recurring service. The short version: for a daily-driven car, yes, it’s genuinely necessary, since moisture absorption and the resulting corrosion risk are measurable chemistry, not sales talk. For the full breakdown of that argument, including when it’s reasonable to push back on a shop’s recommendation, see the dedicated section in our companion guide, How Long Does It Take to Change Brake Fluid? 7 Things to Know.
Common Mistakes to Avoid During a Brake Fluid Flush
A handful of avoidable errors account for most DIY brake bleeding problems:
- Letting the reservoir run dry mid-job. This draws air directly into the system, undoing progress you’ve already made at other wheels.
- Releasing pedal pressure before the bleed screw is closed. This is exactly what happened to my friend, and it’s the single most common two-person method mistake.
- Guessing at the bleeding sequence instead of confirming it. A generic “right rear first” assumption works often, but not always, and getting it wrong on a diagonal-split system can leave air trapped in a circuit you think you’ve already cleared.
- Over-tightening bleed screws. This can snap an aging screw off entirely, turning a simple flush into a much bigger repair.
- Mixing incompatible fluid types. Glycol-based DOT 3, DOT 4, and DOT 5.1 are generally compatible with each other, but silicone-based DOT 5 is a different chemistry entirely and should never be mixed in unless your manufacturer specifically calls for it.
- Skipping the final pedal test. Always confirm a firm, consistent pedal before considering the job done, not just “fluid ran clear, so it’s probably fine.”
Why It’s Worth Using Quality Fluid and the Right Tools
This is a job where the smallest details matter disproportionately. Using the correct DOT rating for your vehicle, fresh fluid from a sealed container (since brake fluid absorbs moisture the moment a bottle is opened), and a reliable bleeding tool rather than the cheapest option available all directly affect whether the job actually restores full braking performance or just moves old fluid around. If you’re not fully confident in diagnosing a spongy pedal after a DIY attempt, having a professional finish or redo the job is a reasonable, safety-conscious choice, brakes are not the system to leave at “probably fine.”
Final Thoughts
A proper brake fluid flush is genuinely approachable for a confident DIYer, but as my friend’s floor-dropping pedal shows, the details, your system’s split type, the correct sequence, closing that bleed screw at exactly the right moment, matter enormously. Get them right, and you’ll have a firm, confident pedal and genuinely fresh fluid throughout the system. Get them wrong, and you’ll know almost immediately.
For the quicker overview of timing and cost, see our companion guide, How Long Does It Take to Change Brake Fluid? 7 Things to Know, and for the full picture of your braking system, our guide on Brake System Maintenance: 10 Essential Tips for Safer Braking ties everything together.And for everything else your car needs on a regular schedule, see our Complete Guide to Car Maintenance: What to Check and When. A careful, correctly sequenced flush is one of the most genuinely satisfying DIY jobs on this entire list, right up until the moment it isn’t, so take your time, confirm your sequence, and don’t skip the testing step at the end.
How much do brake fluid flushes cost?
At most independent shops, a professional brake fluid flush typically runs $75 to $150, covering both fluid and labor for a standard passenger vehicle. If a shop uses a dedicated pressure-bleed machine rather than manual bleeding, the price sometimes runs slightly higher, often $90 to $170, since that equipment completes a faster, single-pass flush. Dealerships and shops servicing vehicles with more complex ABS or electronic stability systems, like many modern BMWs, tend to land toward the higher end, since those systems sometimes require a specialized scan tool to fully cycle the ABS module during the flush. If you’re doing it yourself, the first flush costs roughly $90 to $100 once you factor in a one-time bleeder kit purchase (around $70 to $100) plus fluid, but every flush after that drops to just the cost of fluid, typically $10 to $20.
Can I do a brake fluid flush myself?
Yes, and it’s a genuinely approachable DIY job for a confident home mechanic, though the details matter more than they might seem to at first glance. You’ll need to know your car’s specific brake circuit layout (diagonal split or front/rear split) to bleed the wheels in the correct order, have the right fluid type on hand, and either a helper for the traditional two-person pump-and-hold method or a bleeder kit if you’re working solo. The most common mistake, releasing the brake pedal before the bleed screw is closed, can undo your progress and introduce air right back into a line you just cleared, so patience and attention to sequence matter more than raw mechanical skill. If you finish and the pedal still feels spongy, that’s a reasonable point to bring in a professional rather than keep guessing, since brakes are too safety-critical to leave at “probably fine.”
How often should brake fluid be changed or flushed?
Most manufacturers recommend a full flush every 2 to 3 years, or roughly every 30,000 to 45,000 miles, whichever comes first, regardless of how the brakes feel day to day. This is one of the few maintenance items where time matters more than mileage, since brake fluid absorbs moisture from the air continuously, even in a car that’s barely driven, and that moisture steadily lowers the fluid’s boiling point. A typical brake system can absorb around 2% of its fluid volume in moisture within just a year, which already represents a meaningful loss of safety margin. Always check your specific owner’s manual too, since some manufacturers, particularly European brands with more sensitive ABS components, recommend intervals closer to every 2 years rather than 3.
Is it worth having a brake fluid change?
Yes, for the overwhelming majority of daily-driven vehicles, it’s a genuinely worthwhile, non-optional service rather than an upsell. The underlying reasoning holds up to scrutiny: moisture contamination is measurable chemistry, not a sales tactic, and it directly affects two things that matter, your pedal’s firmness under hard braking and the long-term health of your calipers, wheel cylinders, and ABS components, which can corrode internally from trapped moisture over time. The cost is also modest relative to the risk: a routine flush runs well under $200 in nearly every case, while the corrosion damage or hydraulic failure that can result from skipping it for years can cost many times that to repair. That said, healthy skepticism isn’t unreasonable either, if you want objective confirmation rather than taking a shop’s word for it, a quick fluid moisture test (using test strips or an electronic tester) can show you directly whether your fluid is actually due, rather than relying purely on a calendar.