A neighbor of mine once described the sound as “a dying bird under the hood” — a high-pitched chirping every time she started her car on a cold morning. She drove it for two more weeks, hoping it would just go away. It didn’t. When she finally popped the hood and looked, her serpentine belt was so glazed and cracked it looked more like dried leather than rubber. The fix cost her $180. Ignoring it for two more weeks could have cost her a dead battery, a seized power steering pump, or worse, on the side of the road.
That’s the entire case for learning to do a proper serpentine belt inspection yourself: it takes less than five minutes, requires no special tools beyond a flashlight, and can catch a failing belt weeks before it strands you somewhere far less convenient than your own driveway. This guide walks through exactly how to check yours for wear and damage, what the warning signs actually look like, and when it’s time to replace it. If you’re trying to understand the different belt in your engine’s timing system, our companion guide, Timing Belt vs. Serpentine Belt: What’s the Difference?, covers that distinction in more depth.
What Is a Serpentine Belt, and Why Does It Deserve Attention?
The serpentine belt (also called a drive belt or accessory belt) is the single, long rubber belt that snakes — hence the name — around multiple pulleys on the front of your engine. Unlike the timing belt, which is hidden inside a cover and controls internal engine timing, the serpentine belt is visible from the outside and powers external components: your alternator, power steering pump, air conditioning compressor, and on some vehicles, the water pump too.
Because a single belt drives so many systems at once, its failure doesn’t just affect one thing — it can simultaneously kill your battery charging, your power steering, and your AC, all at the same moment. That’s exactly why a few minutes of regular inspection is worth far more than the effort it takes.
Tools You’ll Need for a Proper Inspection
You don’t need a mechanic’s toolbox for this. Grab:
- A flashlight (a phone flashlight works fine)
- A clean rag
- Your owner’s manual, if you have one, for the belt routing diagram often found under the hood
That’s genuinely it. This is one of the most accessible pieces of car maintenance you can do yourself, with zero risk if you follow one simple rule: always inspect with the engine off and the key removed.
How to Check Serpentine Belt: A Step-by-Step Guide
Step 1: Park on level ground and turn off the engine completely. Let the engine cool if you’ve been driving recently — you’ll be getting your hands close to it.
Step 2: Locate the belt and its routing path. Pop the hood and find the long belt snaking around several pulleys at the front of the engine. Many vehicles have a routing diagram sticker nearby, which helps you understand what you’re looking at.
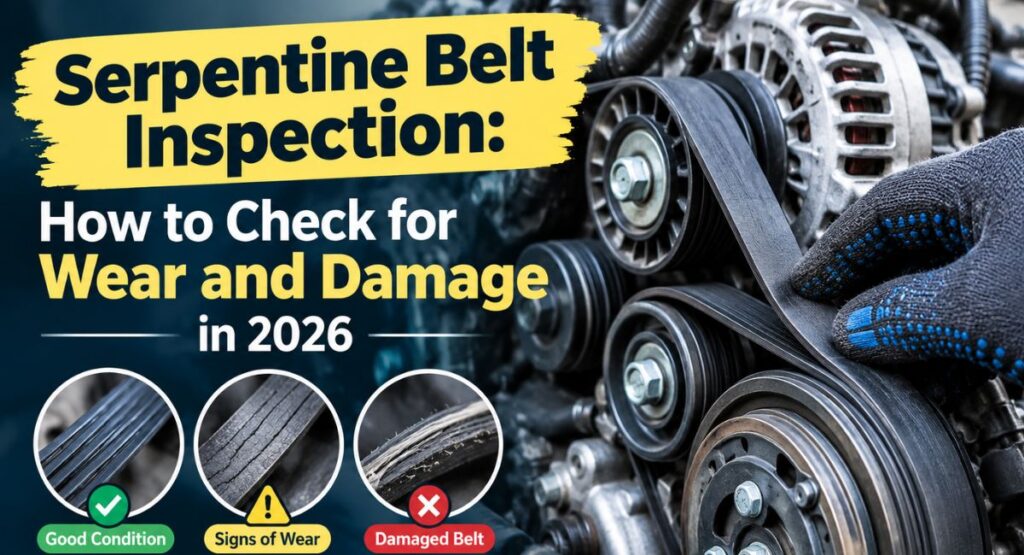
Step 3: Look at both sides of the belt with your flashlight. Examine the ribbed (grooved) side and the smooth backside separately — problems can appear on either surface, and they mean different things.
Step 4: Look for cracking, fraying, and missing chunks. According to Consumer Reports’ belt inspection guide, you’re checking for cracks, fraying, or splits on the top cover, along with any separating layers or missing chunks in the grooves underneath.
Step 5: Check for glazing. A shiny, polished, almost slick-looking surface on the belt — rather than a matte, slightly textured one — is called glazing, and it’s a sign the belt has hardened with age and may be slipping.
Step 6: Twist the belt to check the underside. Gently twist a section of the belt so you can see the grooved underside without removing anything. Look for separating layers or cracks that wouldn’t be visible from the front.
Step 7: Spin the tensioner and idler pulleys by hand. With the engine off, see if these pulleys spin smoothly or feel rough, wobbly, or stiff — a failing pulley can wear out a brand-new belt within months if it’s not addressed alongside it.
Don’t Forget the Serpentine Belt Tensioner
The serpentine belt tensioner is a spring-loaded pulley that keeps constant, correct pressure on the belt as it runs, automatically compensating for minor wear so the belt stays properly seated on every pulley. It’s easy to overlook during an inspection since attention naturally goes to the belt itself, but the tensioner wears out on a similar timeline and deserves equal attention.
To check it: with the engine off, spin the tensioner pulley by hand. It should rotate smoothly and quietly, with no grinding, wobble, or rough spots. Also look at the tensioner’s spring-loaded arm — excessive play or a sluggish return when you move it can indicate the internal spring or bearing is wearing out. A failing tensioner is one of the most common reasons a brand-new belt starts squealing or wearing unevenly within just a few months, since it can no longer maintain the correct, consistent tension the belt depends on.
What Belt Wear Actually Looks Like
Not every visual clue means the same thing, so it helps to know what you’re actually looking at:
| What You See | What It Means |
|---|---|
| Cracks across the ribs | Aging, heat exposure — replace if cracking is significant |
| Frayed edges or exposed cord | Belt is nearing the end of its life |
| Glazed, shiny surface | Belt has hardened and may be slipping |
| Missing chunks or rounded ribs | Material loss from wear, reduces grip |
| Oil or coolant contamination | A leak nearby is degrading the rubber |
| Uneven wear on one edge | Pulley misalignment, not just belt age |
Here’s a genuinely important nuance: older belts made from neoprene rubber follow a fairly reliable rule — NAPA notes that more than three cracks within the same three-inch section is a sign it’s time to replace. But many newer belts are made from EPDM (ethylene propylene diene monomer), a more advanced rubber compound that resists cracking almost entirely and can run well past 100,000 miles without a single visible crack — even while quietly wearing down in a different way. For these belts, cracking isn’t the best indicator at all; material loss, glazing, and a worn rib profile matter more than the classic “count the cracks” method most people learned years ago.
Serpentine Belt Wear Gauge: A More Precise Way to Check
Here’s an important limitation of the visual and tactile inspection covered above: modern EPDM belts are specifically engineered to resist visible cracking, which means a belt can look almost perfect while it’s already worn enough to start slipping. This is exactly the problem a serpentine belt wear gauge is designed to solve.
A Continental belt wear gauge and the similar Gates Belt Wear Gauge are small, inexpensive handheld tools that measure actual material loss in the belt’s grooves rather than relying on what you can see. Here’s how they work:
- Profile test: Press the gauge’s toothed edge into the belt’s grooves. If the teeth fit snugly into every groove, the belt still has sufficient rib profile remaining. If they don’t seat properly, the ribs have worn down and the belt needs replacing.
- Uneven wear test: Press the gauge’s narrow edge into each groove individually. It shouldn’t “bottom out” in any single groove — if it does, that groove has worn unevenly compared to the others, often a sign of pulley misalignment.
- Rocking test (Gates version): Press the gauge into the belt with light pressure and try to rock it side to side. If it stays tightly seated, the belt has life left. If it rocks, the ribs are worn enough to allow slipping, and replacement is due.
These tools cost very little and are widely available through auto parts retailers or directly from Gates and Continental. For anyone who wants a more EPDM belt wear gauge-style objective answer rather than relying purely on the naked eye, this is genuinely worth the small investment — especially since, as Gates itself has noted, modern belts don’t always show clear visual wear until they’re already close to failing.
How to Know When to Replace Serpentine Belt: Interval and Timing
As a general guideline, inspect your serpentine belt at every oil change — it takes only a few extra minutes while the hood is already up. In terms of full replacement, the Car Care Council notes that the risk of failure rises meaningfully after roughly 50,000 miles, though many modern EPDM belts are rated for 90,000 to 100,000 miles under normal conditions. Check your owner’s manual for your specific vehicle’s recommended interval, since this varies more than most drivers expect.
Symptoms of a Failing Serpentine Belt You Might Notice While Driving
Beyond a visual inspection, several symptoms can show up during normal driving:
- A high-pitched squealing or chirping sound, especially on startup or when turning the wheel
- A battery warning light or dimming electrical accessories, since the alternator stops charging properly
- Heavier-than-normal steering effort, if power steering loses its drive
- The engine overheating, if the belt also drives the water pump on your vehicle
- Reduced or warm air from the AC system
- A burning rubber smell from under the hood
If you notice any of these, it’s worth performing the inspection above as soon as possible, ideally before the belt fails completely and takes several accessory systems down with it at once.
Serpentine Belt Replacement Cost: What to Expect
The good news: this is one of the more affordable jobs in car maintenance. A basic belt-only replacement typically runs $100 to $250 at an independent shop, with the belt itself costing only $25 to $75 — labor makes up most of the bill, similar to other belt-related jobs. If the tensioner or idler pulleys need replacing at the same time (often recommended once they’ve logged similar mileage to the belt), the total commonly runs $200 to $450. DIY replacement is realistic for many drivers with basic tools, bringing the cost down to just the parts.
Serpentine Belt vs. Timing Belt: A Quick Comparison
Since these two are so often confused, here’s a side-by-side look:
| Serpentine Belt | Timing Belt | |
|---|---|---|
| Location | Outside the engine, visible | Inside a cover, hidden |
| Job | Drives alternator, power steering, A/C | Synchronizes crankshaft and camshaft |
| Inspection | Simple DIY visual/tactile check | Usually requires removing covers |
| Failure result | Loses power steering, charging, A/C; engine usually keeps running | Engine stops; can cause serious internal damage on interference engines |
| Typical cost | $100–$250 (belt only) | $500–$1,500 |
| Typical interval | 50,000–100,000 miles | 60,000–100,000 miles |
The practical takeaway: both deserve regular attention, but the serpentine belt is the one you can realistically check yourself in your driveway, while the timing belt is almost always a job for a professional shop.
Common Mistakes People Make With Serpentine Belt Inspection
A few patterns are worth avoiding, even among otherwise attentive drivers:
- Only checking the visible front side. The grooved underside often shows wear long before the smooth top cover does — skipping the twist-and-check step misses this entirely.
- Relying only on the “count the cracks” rule. As covered above, this works for older neoprene belts but can miss real wear on newer EPDM belts, which resist cracking even as they lose material.
- Ignoring the tensioner and idler pulleys. A brand-new belt paired with a worn, wobbly tensioner will often fail again within months — the belt was never the actual problem.
- Waiting for a sound before looking. Many belts show visible wear well before they start squealing. A five-minute visual check at every oil change catches issues before they become audible.
- Assuming “it looks fine” means “it’s fine.” EPDM belts in particular can look nearly perfect while quietly losing rib depth and grip — this is exactly why the touch test (feeling for rounded or worn ribs) matters as much as the visual one.
Avoiding these missteps is often the difference between catching a problem in your driveway and discovering it stranded on the shoulder of a highway.
Why It’s Worth Using Quality Parts for This Job
Because a single serpentine belt drives so many critical systems at once, this isn’t the place to grab the cheapest belt on the shelf. A quality belt from a reputable manufacturer, correctly tensioned and paired with a tensioner and idler pulleys that aren’t already worn out, is what actually prevents the exact scenario my neighbor experienced. Ask your mechanic whether the tensioner and idler pulleys are being inspected alongside the belt — replacing a belt while ignoring a worn tensioner is a common way to end up back in the shop within months, having paid for labor twice over something that could have been solved in one visit.
Final Thoughts
A proper serpentine belt inspection takes less time than making a cup of coffee, and it’s one of the easiest ways to catch a problem before it turns into a roadside breakdown. A quick look, a feel of the ribs, and a twist to check the underside — that’s genuinely most of what it takes to stay ahead of this component.
For the full picture of how this belt differs from your engine’s internal timing system, see Timing Belt Explained: What Is a Timing Belt and What Does It Do?, and for everything else your car needs on a schedule, our Complete Guide to Car Maintenance: What to Check and When covers it in full. A five-minute check today is a lot cheaper than a tow truck tomorrow — and unlike so many repairs hiding under the hood, this is one you can genuinely learn to catch yourself, with nothing more than a flashlight and a few minutes of attention.
Frequently Asked Questions
How often should you check your serpentine belt?
A good rule of thumb is to visually check it at every oil change, since the hood is already up and it only takes a couple of extra minutes. In terms of full replacement, the Car Care Council notes that failure risk rises meaningfully after roughly 50,000 miles, though many modern EPDM belts are rated for 90,000 to 100,000 miles under normal driving conditions. If you drive in severe conditions — frequent short trips, extreme heat or cold, or heavy stop-and-go traffic — it’s worth inspecting more frequently and leaning toward the earlier end of that mileage range, since these conditions accelerate belt wear beyond the “normal” baseline most manufacturers assume.
How do I tell if my serpentine belt is worn out?
Look for several specific signs during a visual and tactile inspection, with the engine off: cracking across the ribs, frayed edges or exposed cord, a shiny/glazed surface instead of a matte one, missing chunks or rounded-looking ribs, and any oil or coolant contamination on the belt. Twist a section of the belt to check the grooved underside as well, since wear often shows up there before it’s visible from the front. One important nuance: older neoprene belts follow a fairly reliable “three cracks in three inches” rule, but many newer EPDM belts resist cracking almost entirely while still losing material and grip — for these, a belt wear gauge (like the Continental or Gates version) gives a far more reliable answer than a visual check alone, since it measures actual rib wear rather than relying on what you can see.
Can I still drive with a bad serpentine belt?
For a short time, yes, but it’s risky and not something to delay unnecessarily. Because a single serpentine belt typically drives your alternator, power steering, and air conditioning all at once, a failure doesn’t just affect one system — it can simultaneously kill your battery charging, make steering suddenly much harder, and knock out your AC, all in the same moment. On some vehicles, the belt also drives the water pump, meaning a failure can lead to overheating as well. If you’re already hearing squealing, seeing dimming lights, or noticing heavier steering, treat it as a near-term priority rather than something to put off, since these are typically signs the belt is close to complete failure rather than just cosmetically worn.
How much does a serpentine belt cost to fix?
At an independent shop, a basic belt-only replacement typically runs $100 to $250, with the belt itself costing only $25 to $75 — labor makes up the bulk of the bill. If the tensioner or idler pulleys need replacing at the same time, which is often recommended once they’ve logged similar mileage to the belt, the total commonly runs $200 to $450. DIY replacement is realistic for many drivers with basic tools, bringing your cost down to just the parts, typically under $80.
What is the average lifespan of a serpentine belt?
Most serpentine belts are designed to last somewhere between 50,000 and 100,000 miles, depending on the belt material and your driving conditions. Older-style neoprene belts tend to sit toward the lower end of that range, while modern EPDM belts, built with a more heat- and wear-resistant compound, can often reach the full 90,000-100,000-mile range under normal conditions. Severe driving conditions — extreme temperatures, frequent short trips, heavy accessory use like AC and power steering — can shorten that realistic lifespan compared to the manufacturer’s baseline figure.
How much does Jiffy Lube charge to replace a serpentine belt?
Jiffy Lube doesn’t publish a single fixed nationwide price — like most service chains, the exact cost depends on your specific vehicle and location, and they generally provide a personalized estimate based on your car’s year, make, model, and engine. That said, third-party cost trackers commonly cite a typical range of $150 to $250 for a serpentine belt replacement at Jiffy Lube, which lines up closely with general market rates at similar auto service chains. If you want an exact number, the most reliable approach is requesting a personalized quote directly from Jiffy Lube for your specific vehicle, since the estimate can shift based on belt accessibility and whether a tensioner or pulley replacement is also recommended.